
This post shows how to use a GPS receiver with a Raspberry Pi to build a stratum 1 NTP server. I am showing how to solder and use the GPS module (especially with its PPS pin) and listing all Linux commands to set up and check the receiver and its NTP part, which is IPv6-only in my case. Some more hints to increase the performance of the server round things off. In summary, this is a nice “do it yourself” project with a working stratum 1 NTP server at really low costs. Great. However, keep in mind that you should not rely on such projects in enterprise environments that are more focused on reliability and availability (which is not the case on self soldered modules and many config file edits).
At the time of writing (Nov 2018) I am using a Raspberry Pi 1 B (yes, the old one), kernel 4.14.71+ and Raspbian GNU/Linux 9 (stretch). I installed a few relevant packages and gave it a static IPv6 address. Legacy IP (IPv4) is not used at all, only IPv6. [UPDATE Oct 2021: I updated some commands and procedures. I am now using a Raspberry Pi 3 B, Raspberry Pi OS 10 (buster), kernel 5.10.63-v7+.]

1) Soldering the GPS Module
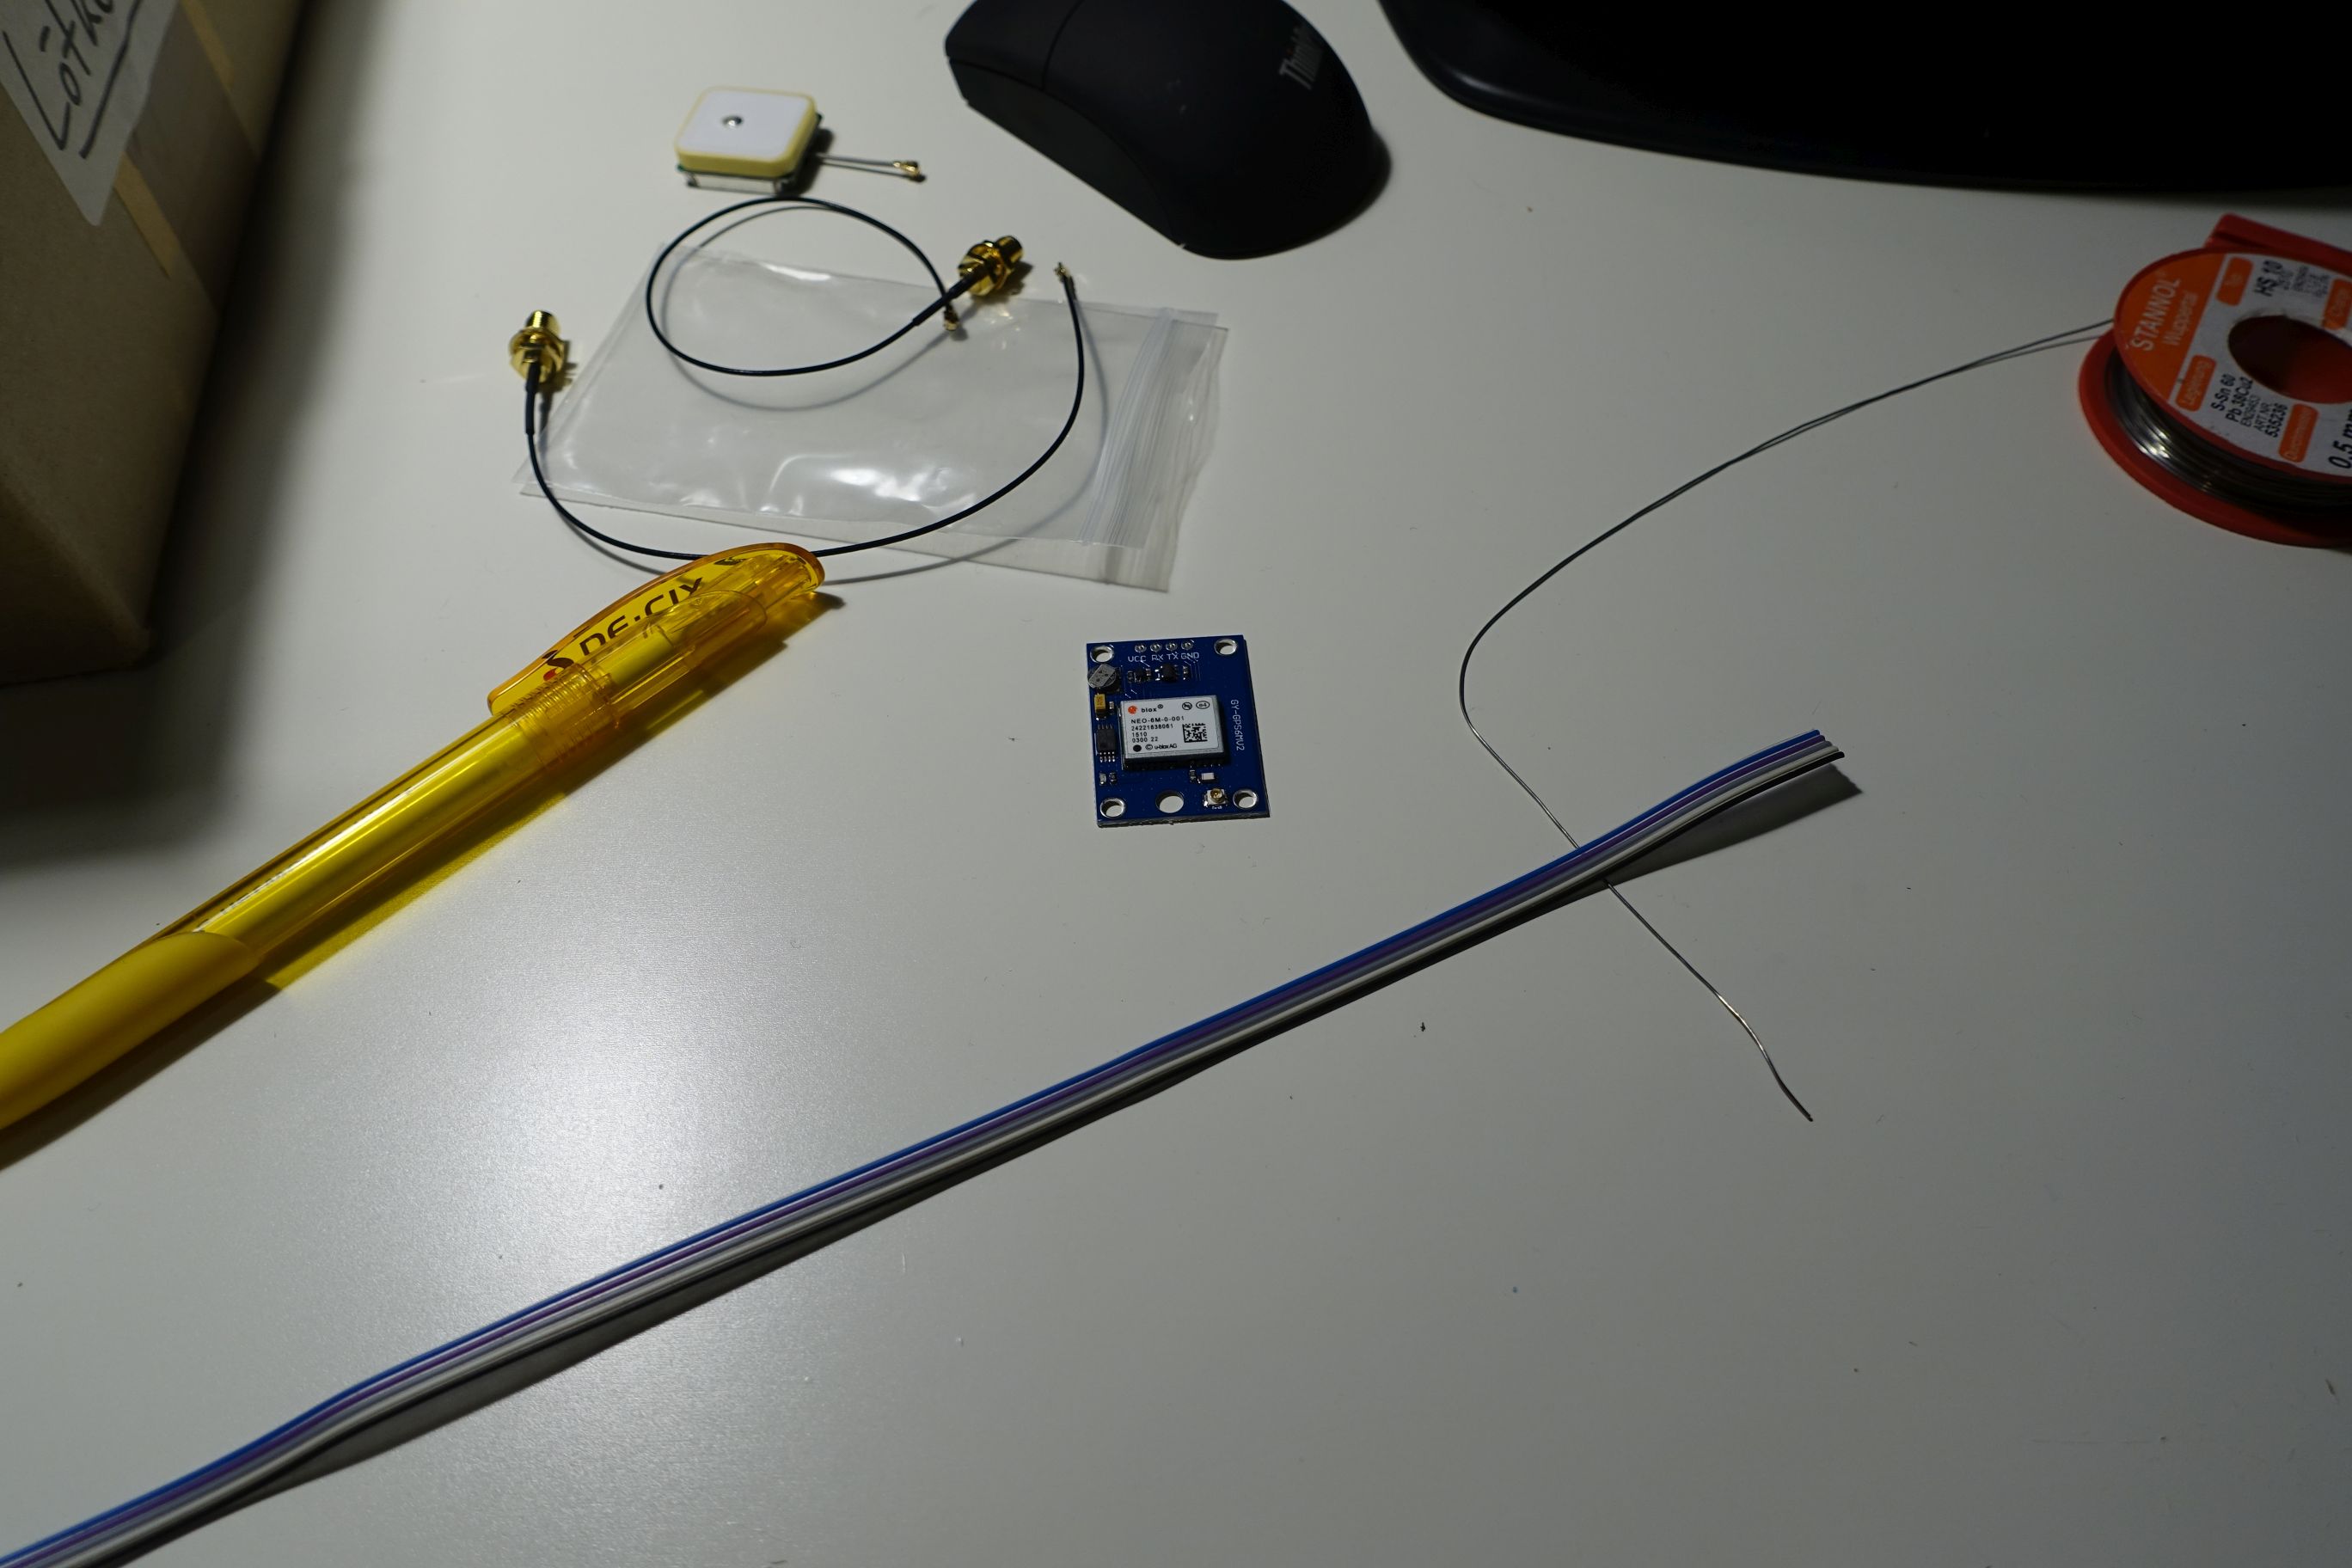
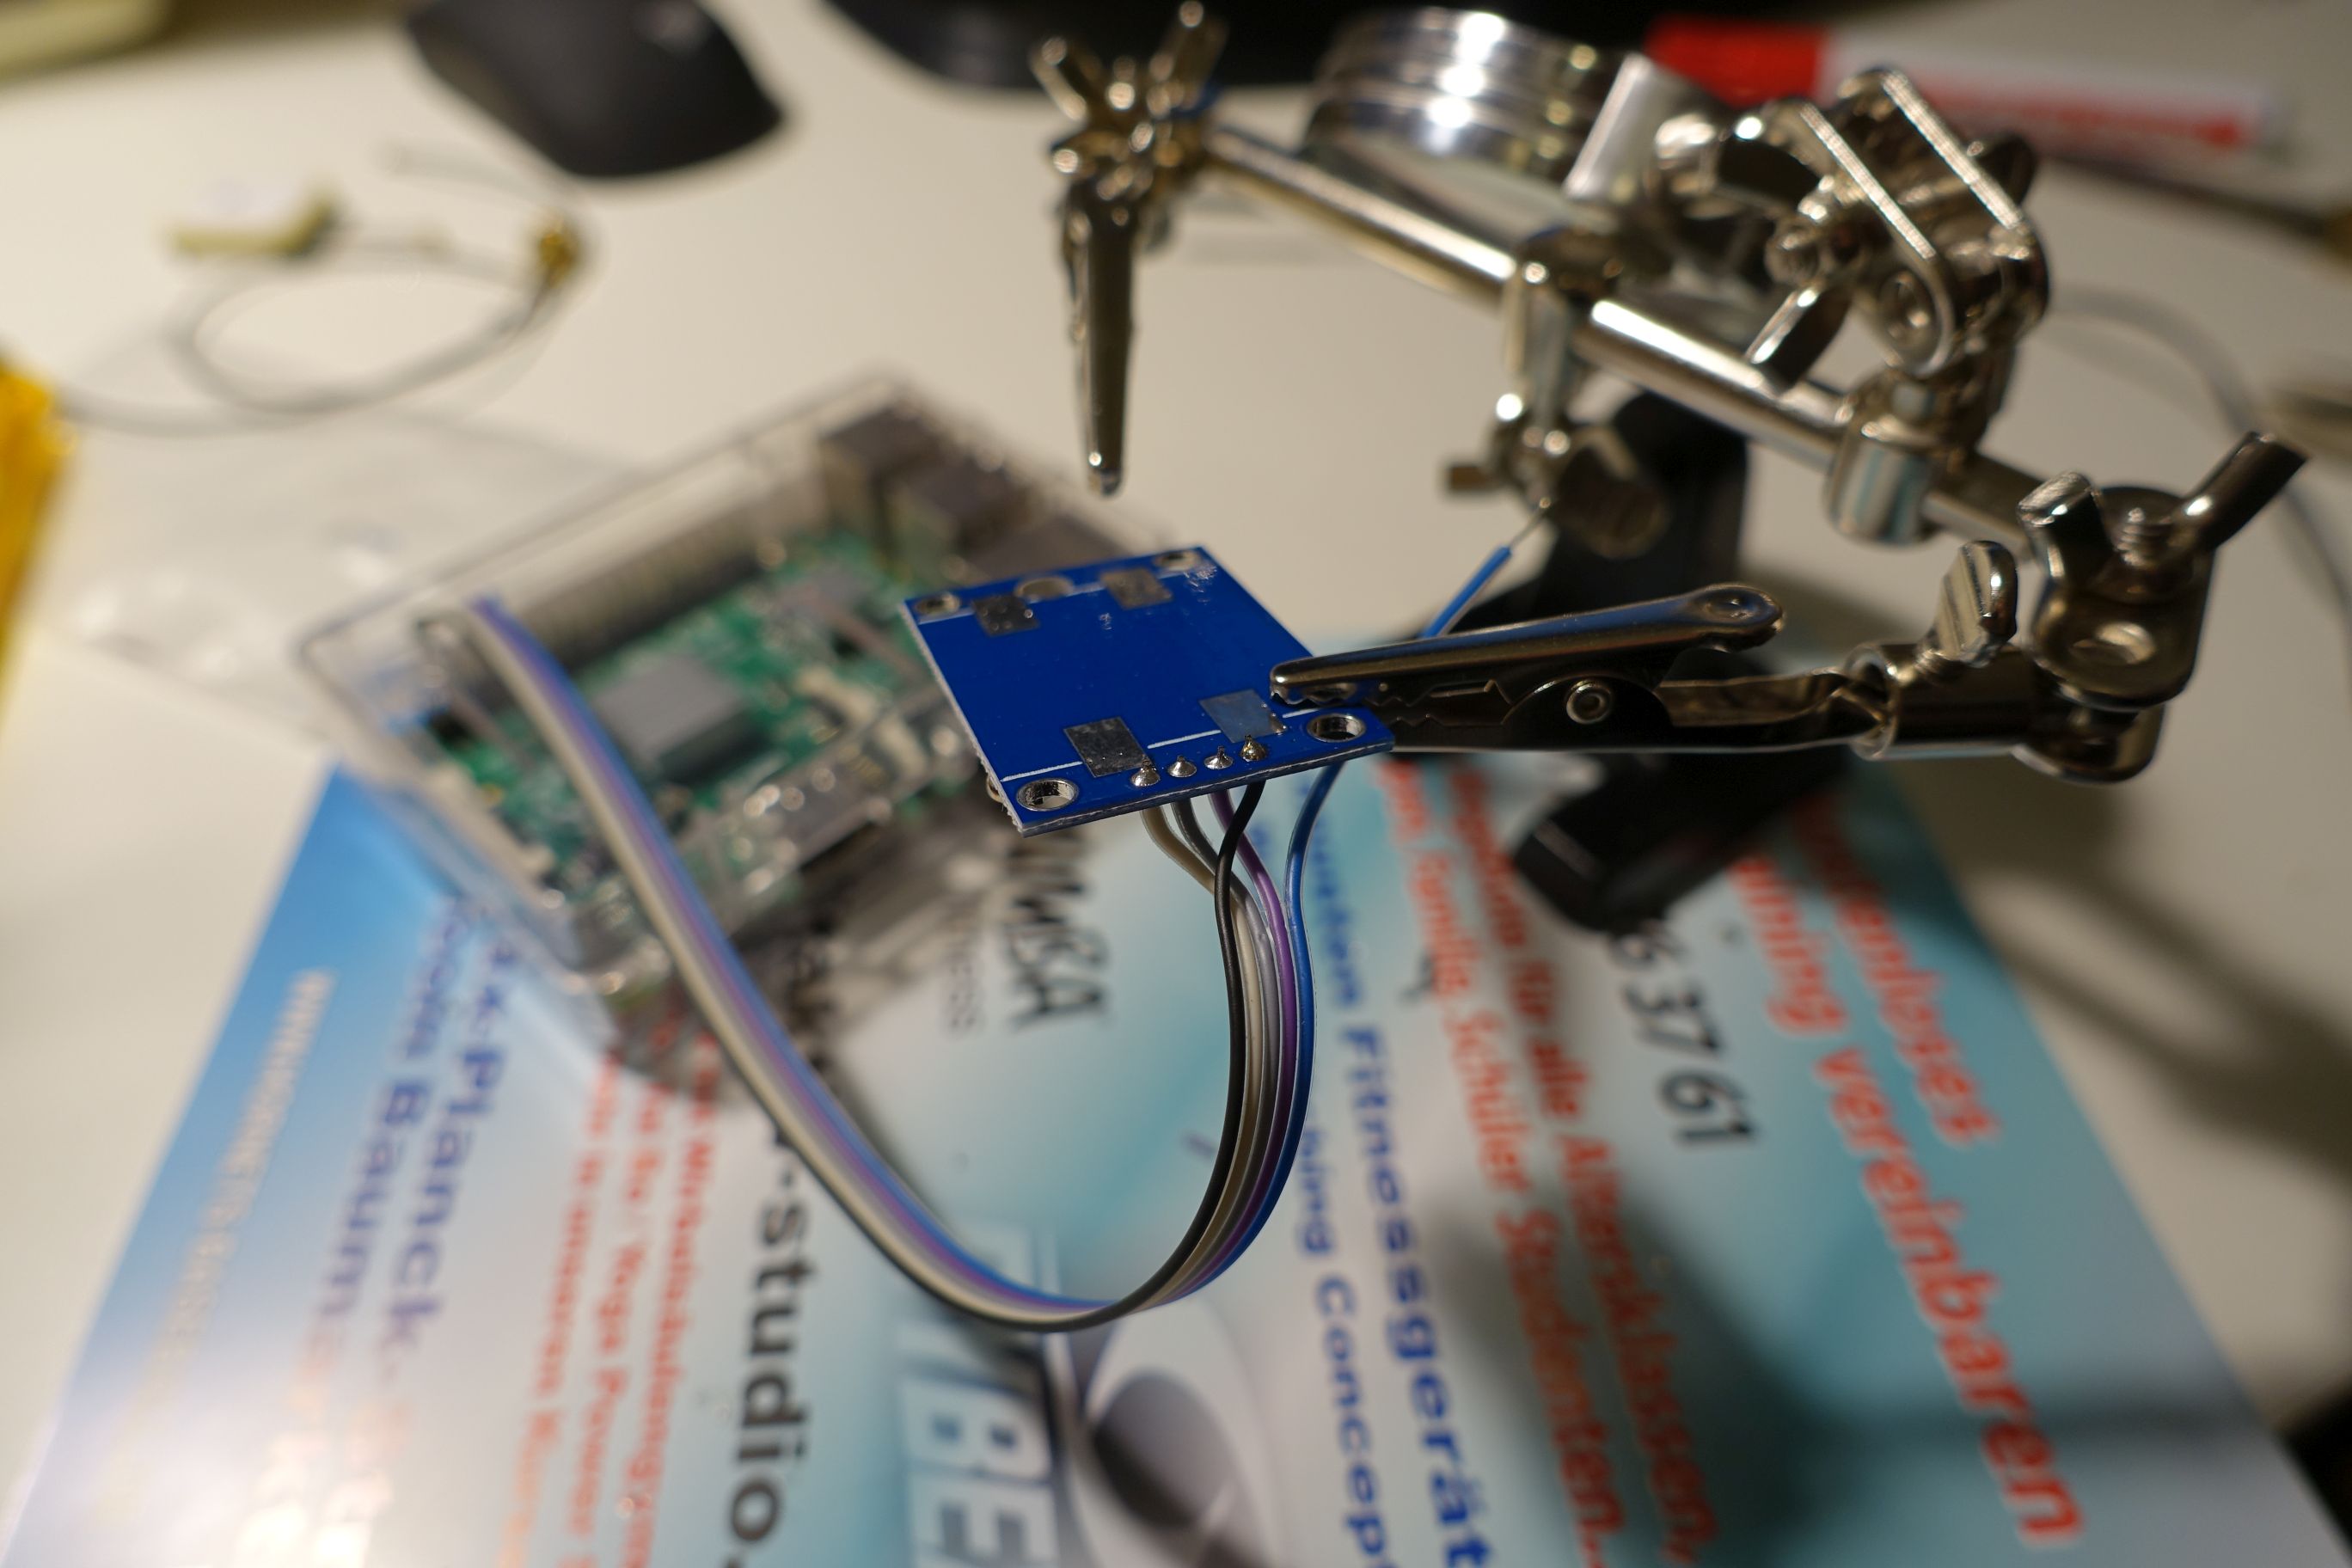
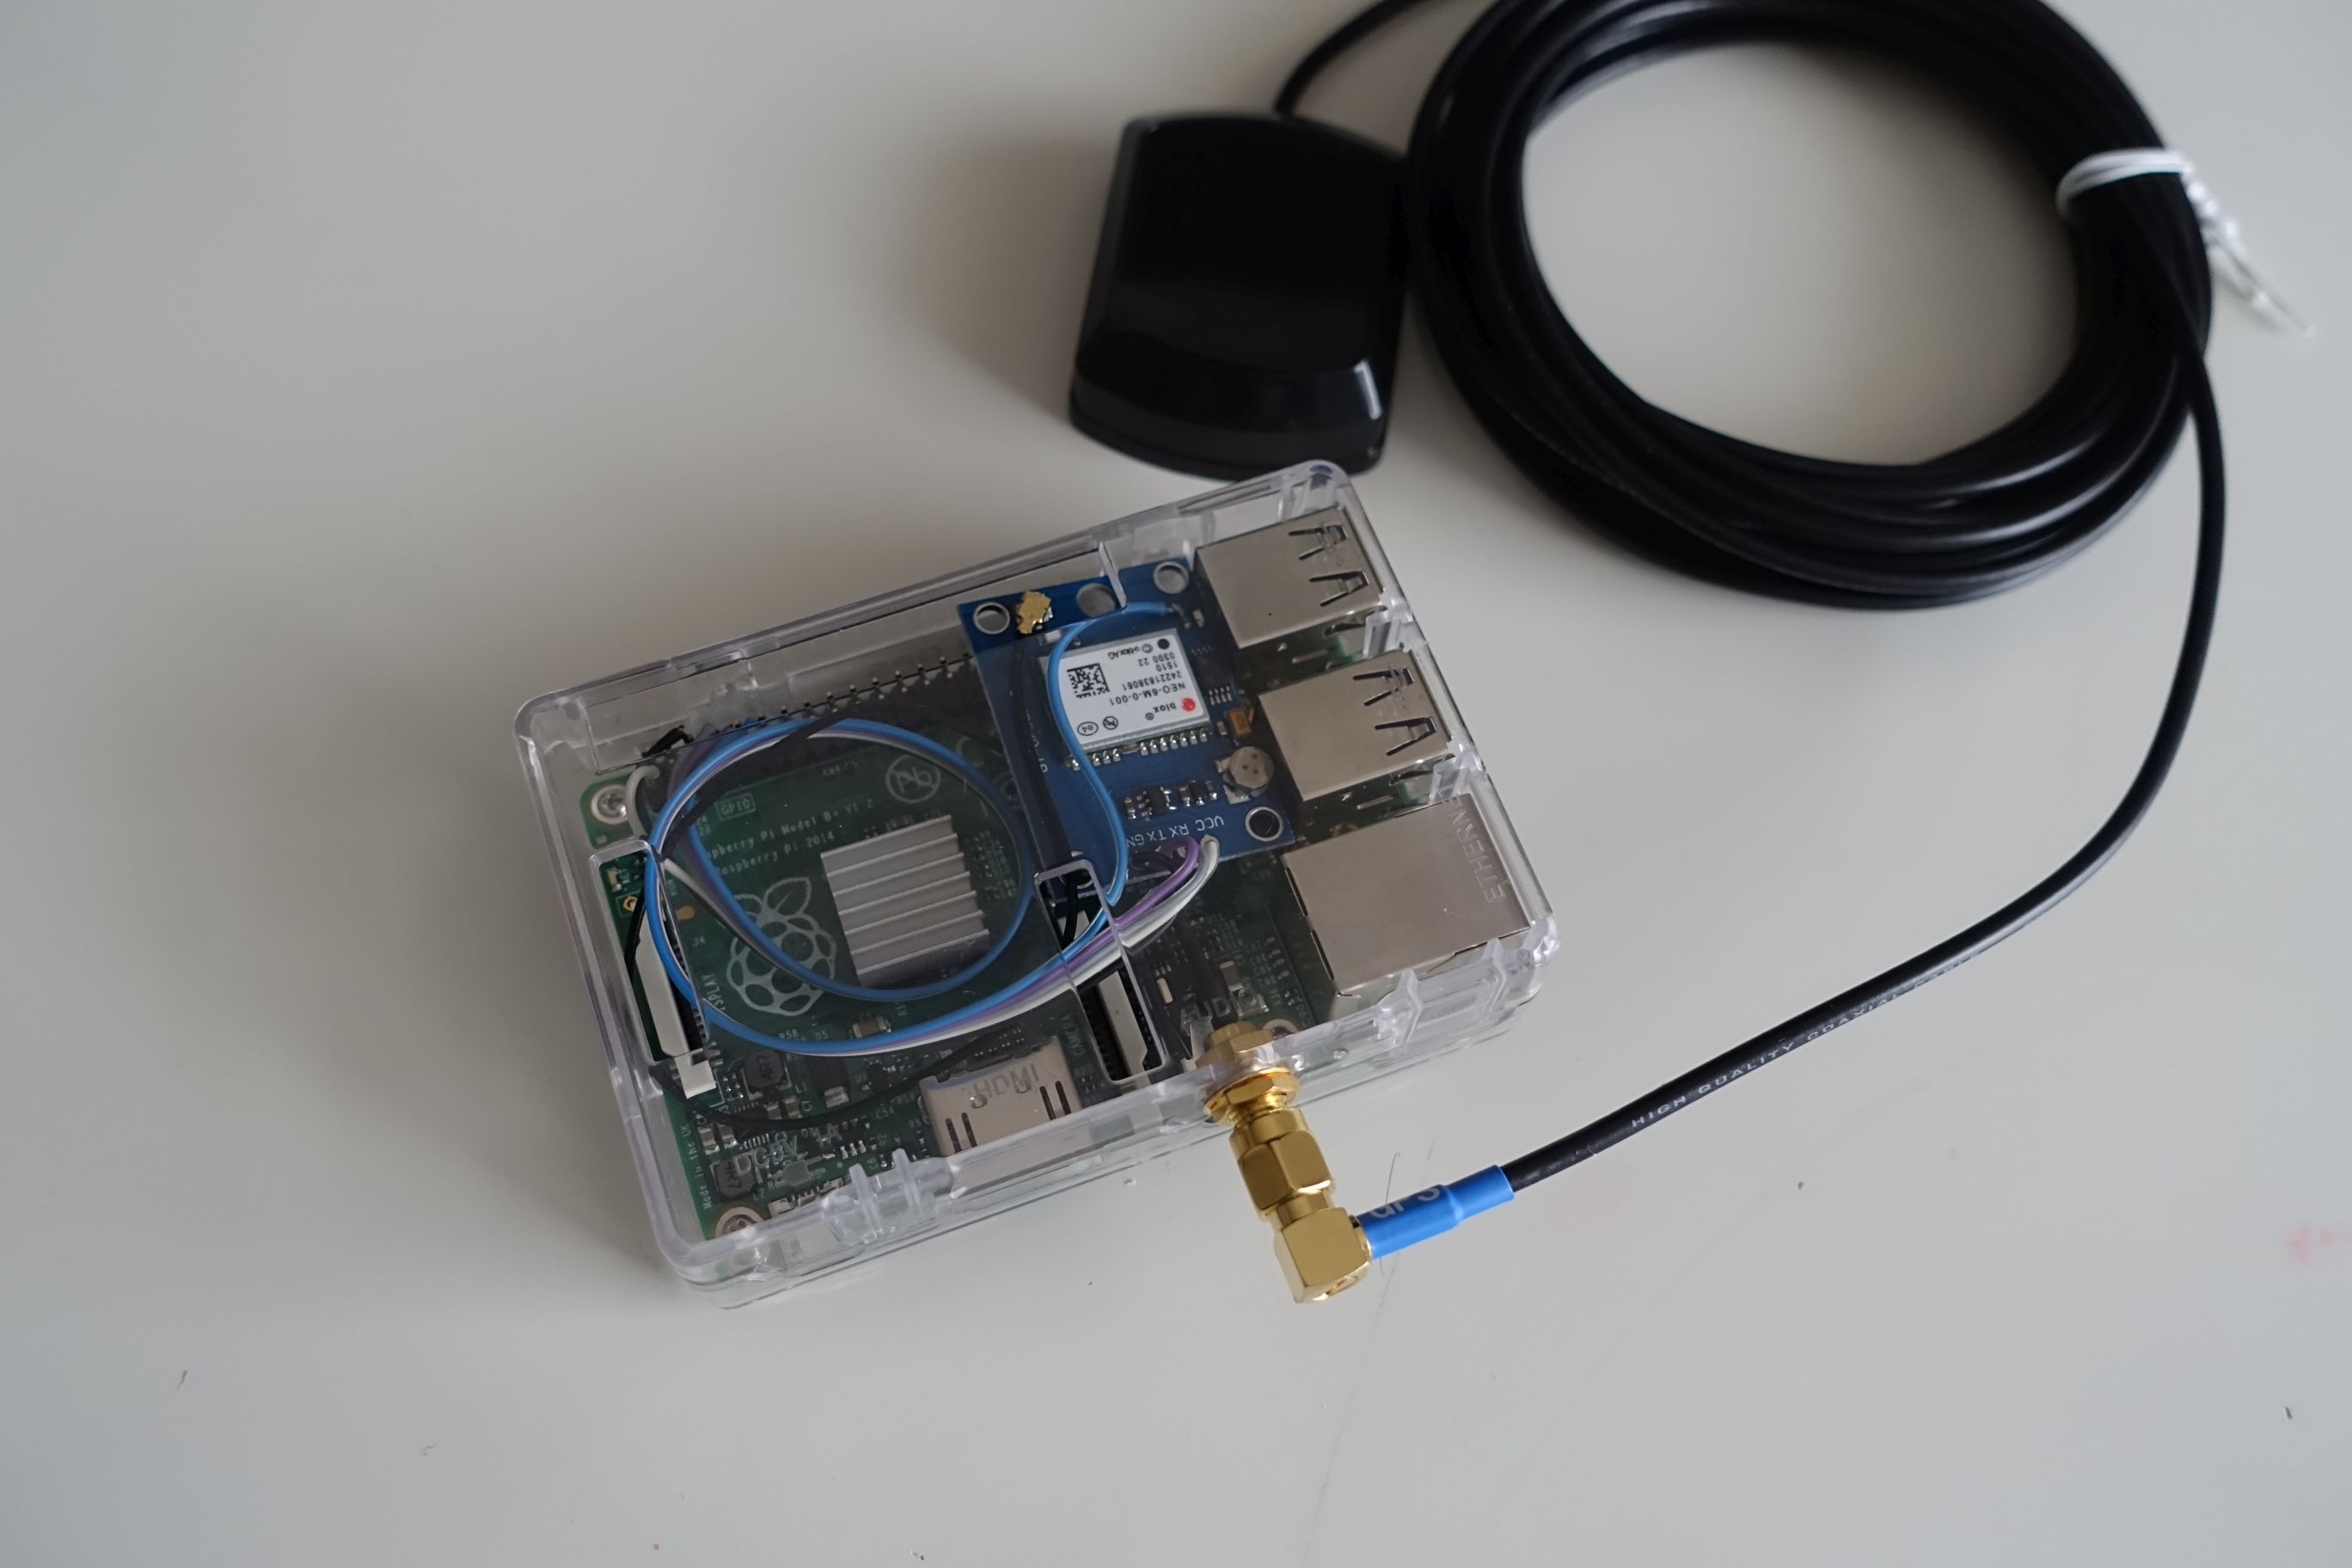
It’s all about the GPS module “GY-GPS6MV2”, though I am quite sure that there are some other GPS modules with a PPS pin out there. Google for it and get one from China for a couple of Euros. ;) I soldered the five cables directly to the Pi, while I used a small Pigtail from the Hirose connector (the one on the GPS module) to SMA female (not RP-SMA!) to mount it on the housing of the Pi. This SMA connector is commonly used by GPS antennas for cars. In fact, I did not use the small GPS antenna that was delivered with the GPS module at all, but a slightly more robust one that can be used outside as well.
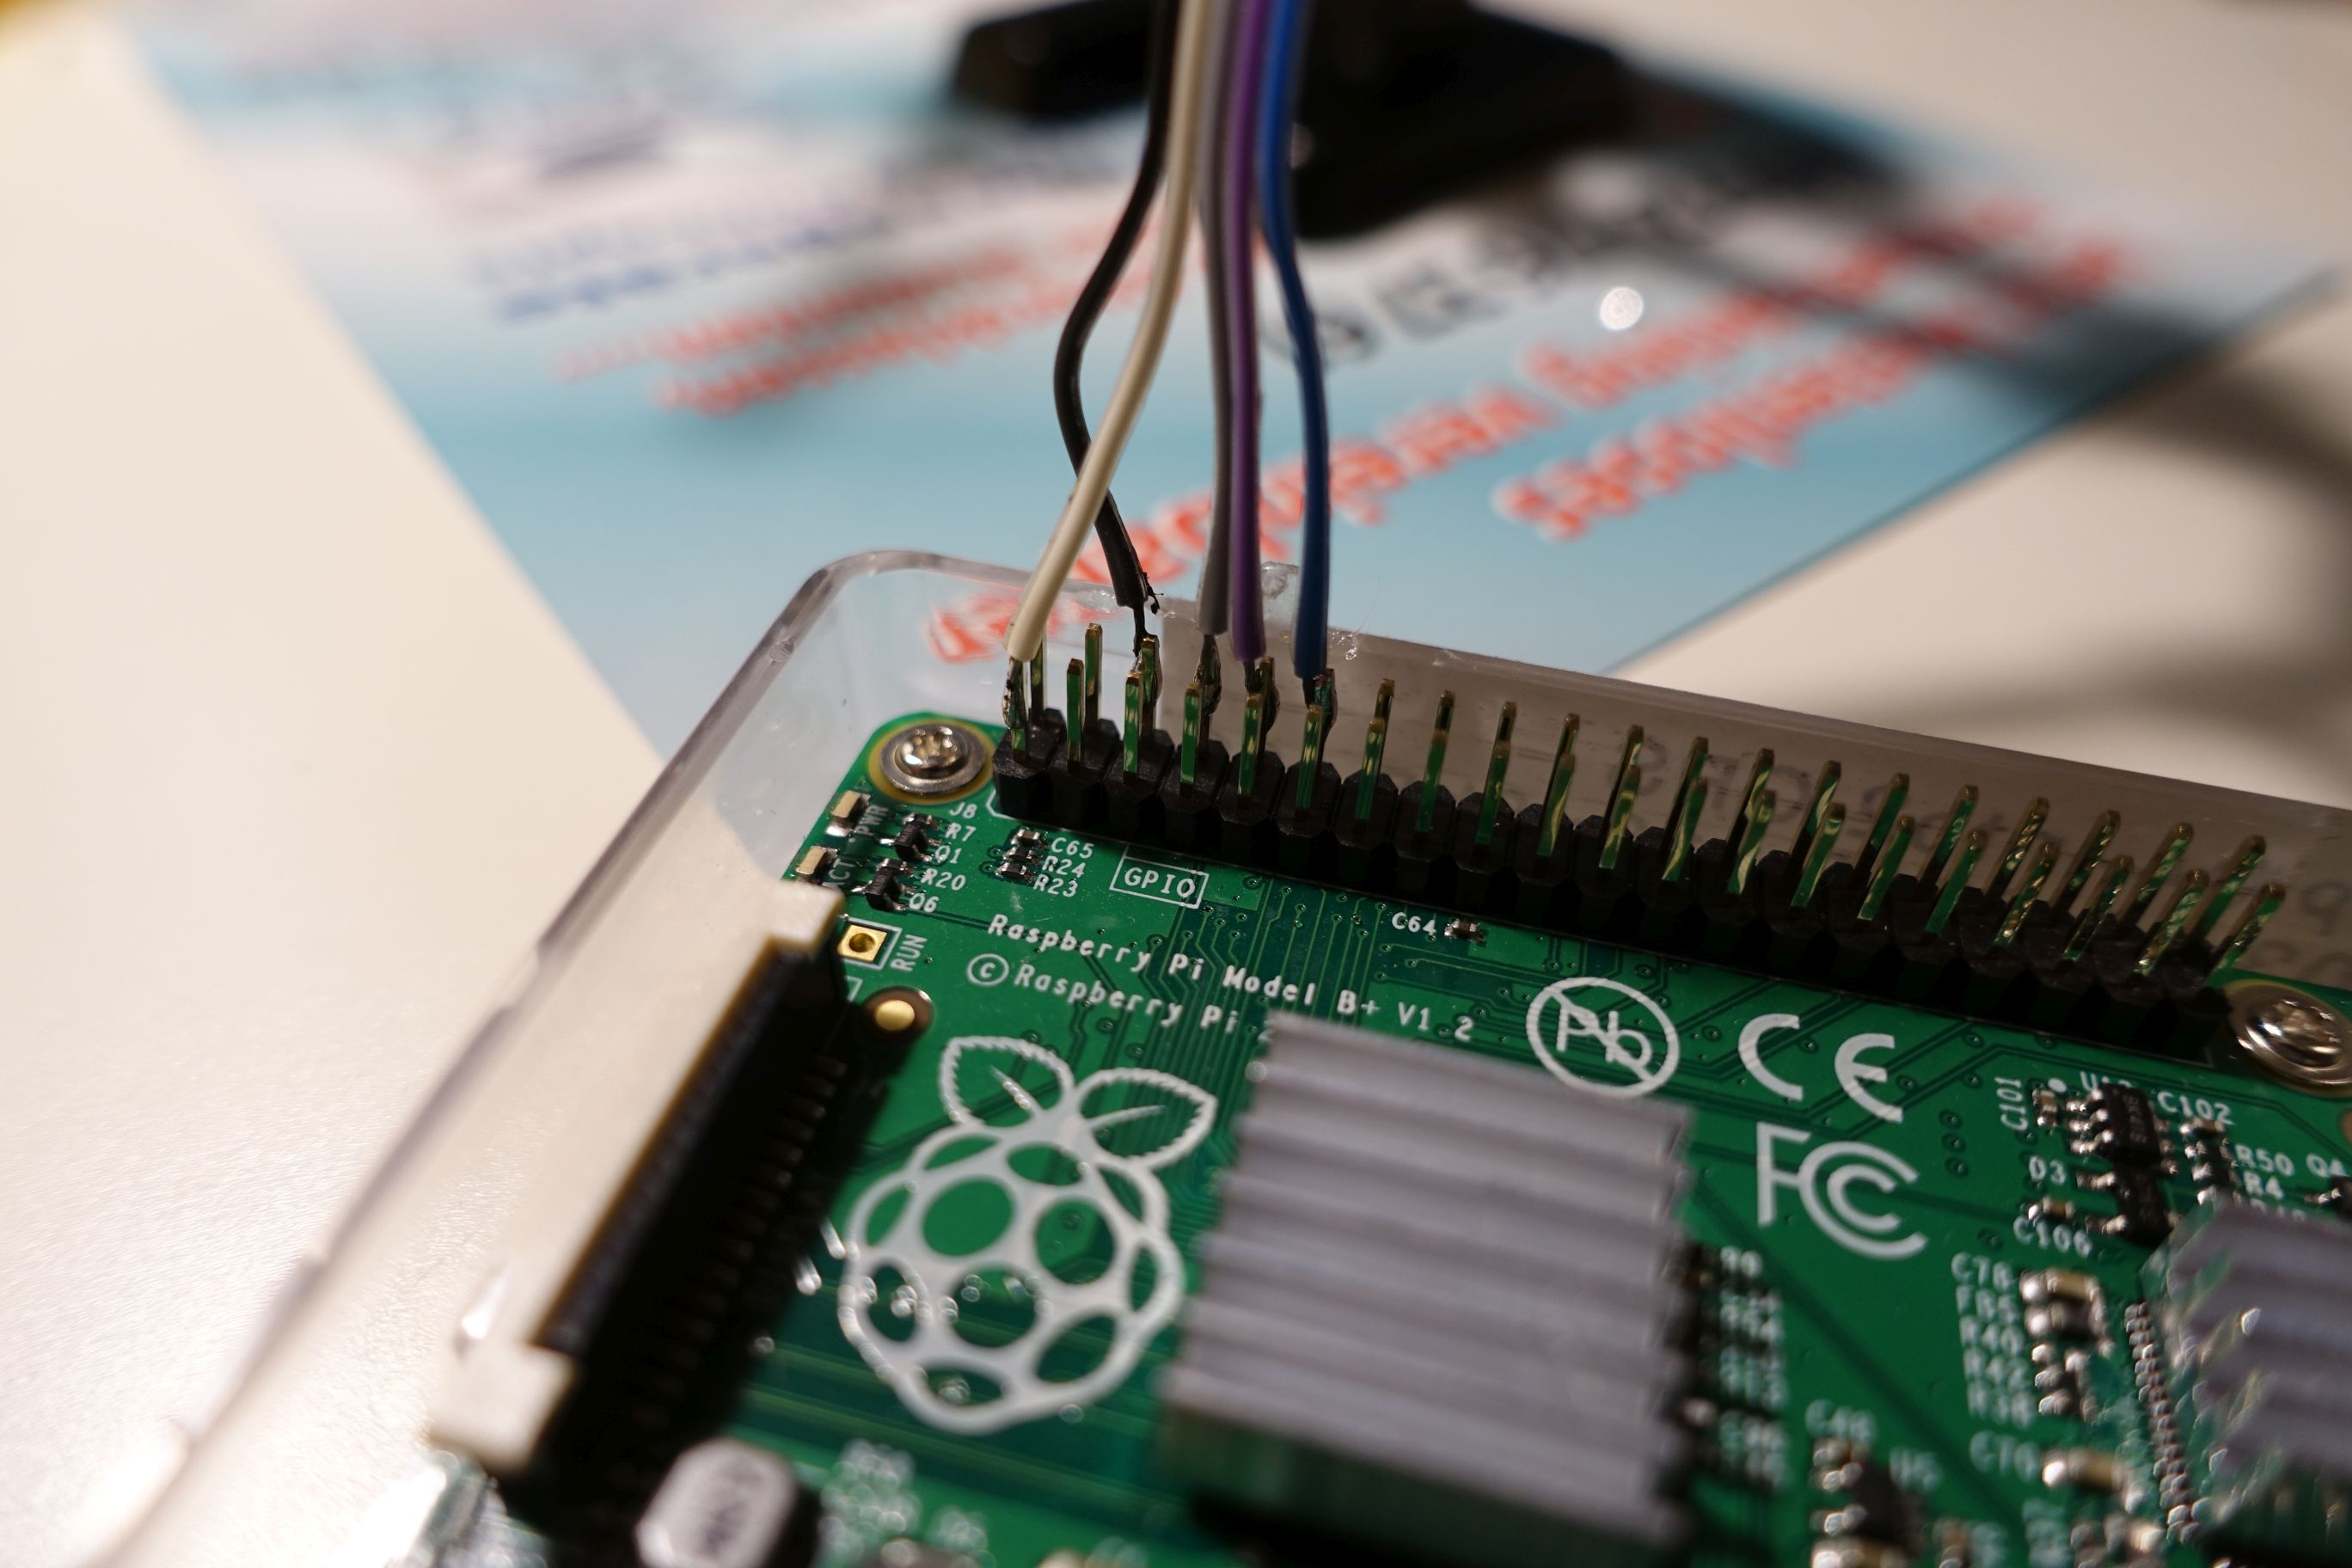
Following is the assignment of the five cables from the GPS module to the Raspberry Pi. You need to look at the product details of the module to find the PPS pin. I used a ribbon cable, refer to the photos below:
- GPS module VCC, white: Pi pin 1, +3.3 V
- GPS module GND, black: Pi pin 6, GND
- GPS module RX, grey: Pi pin 8, TXD0
- GPS module TX, purple: Pi pin 10, RXD0
- GPS module PPS, blue: Pi pin 12, GPIO18
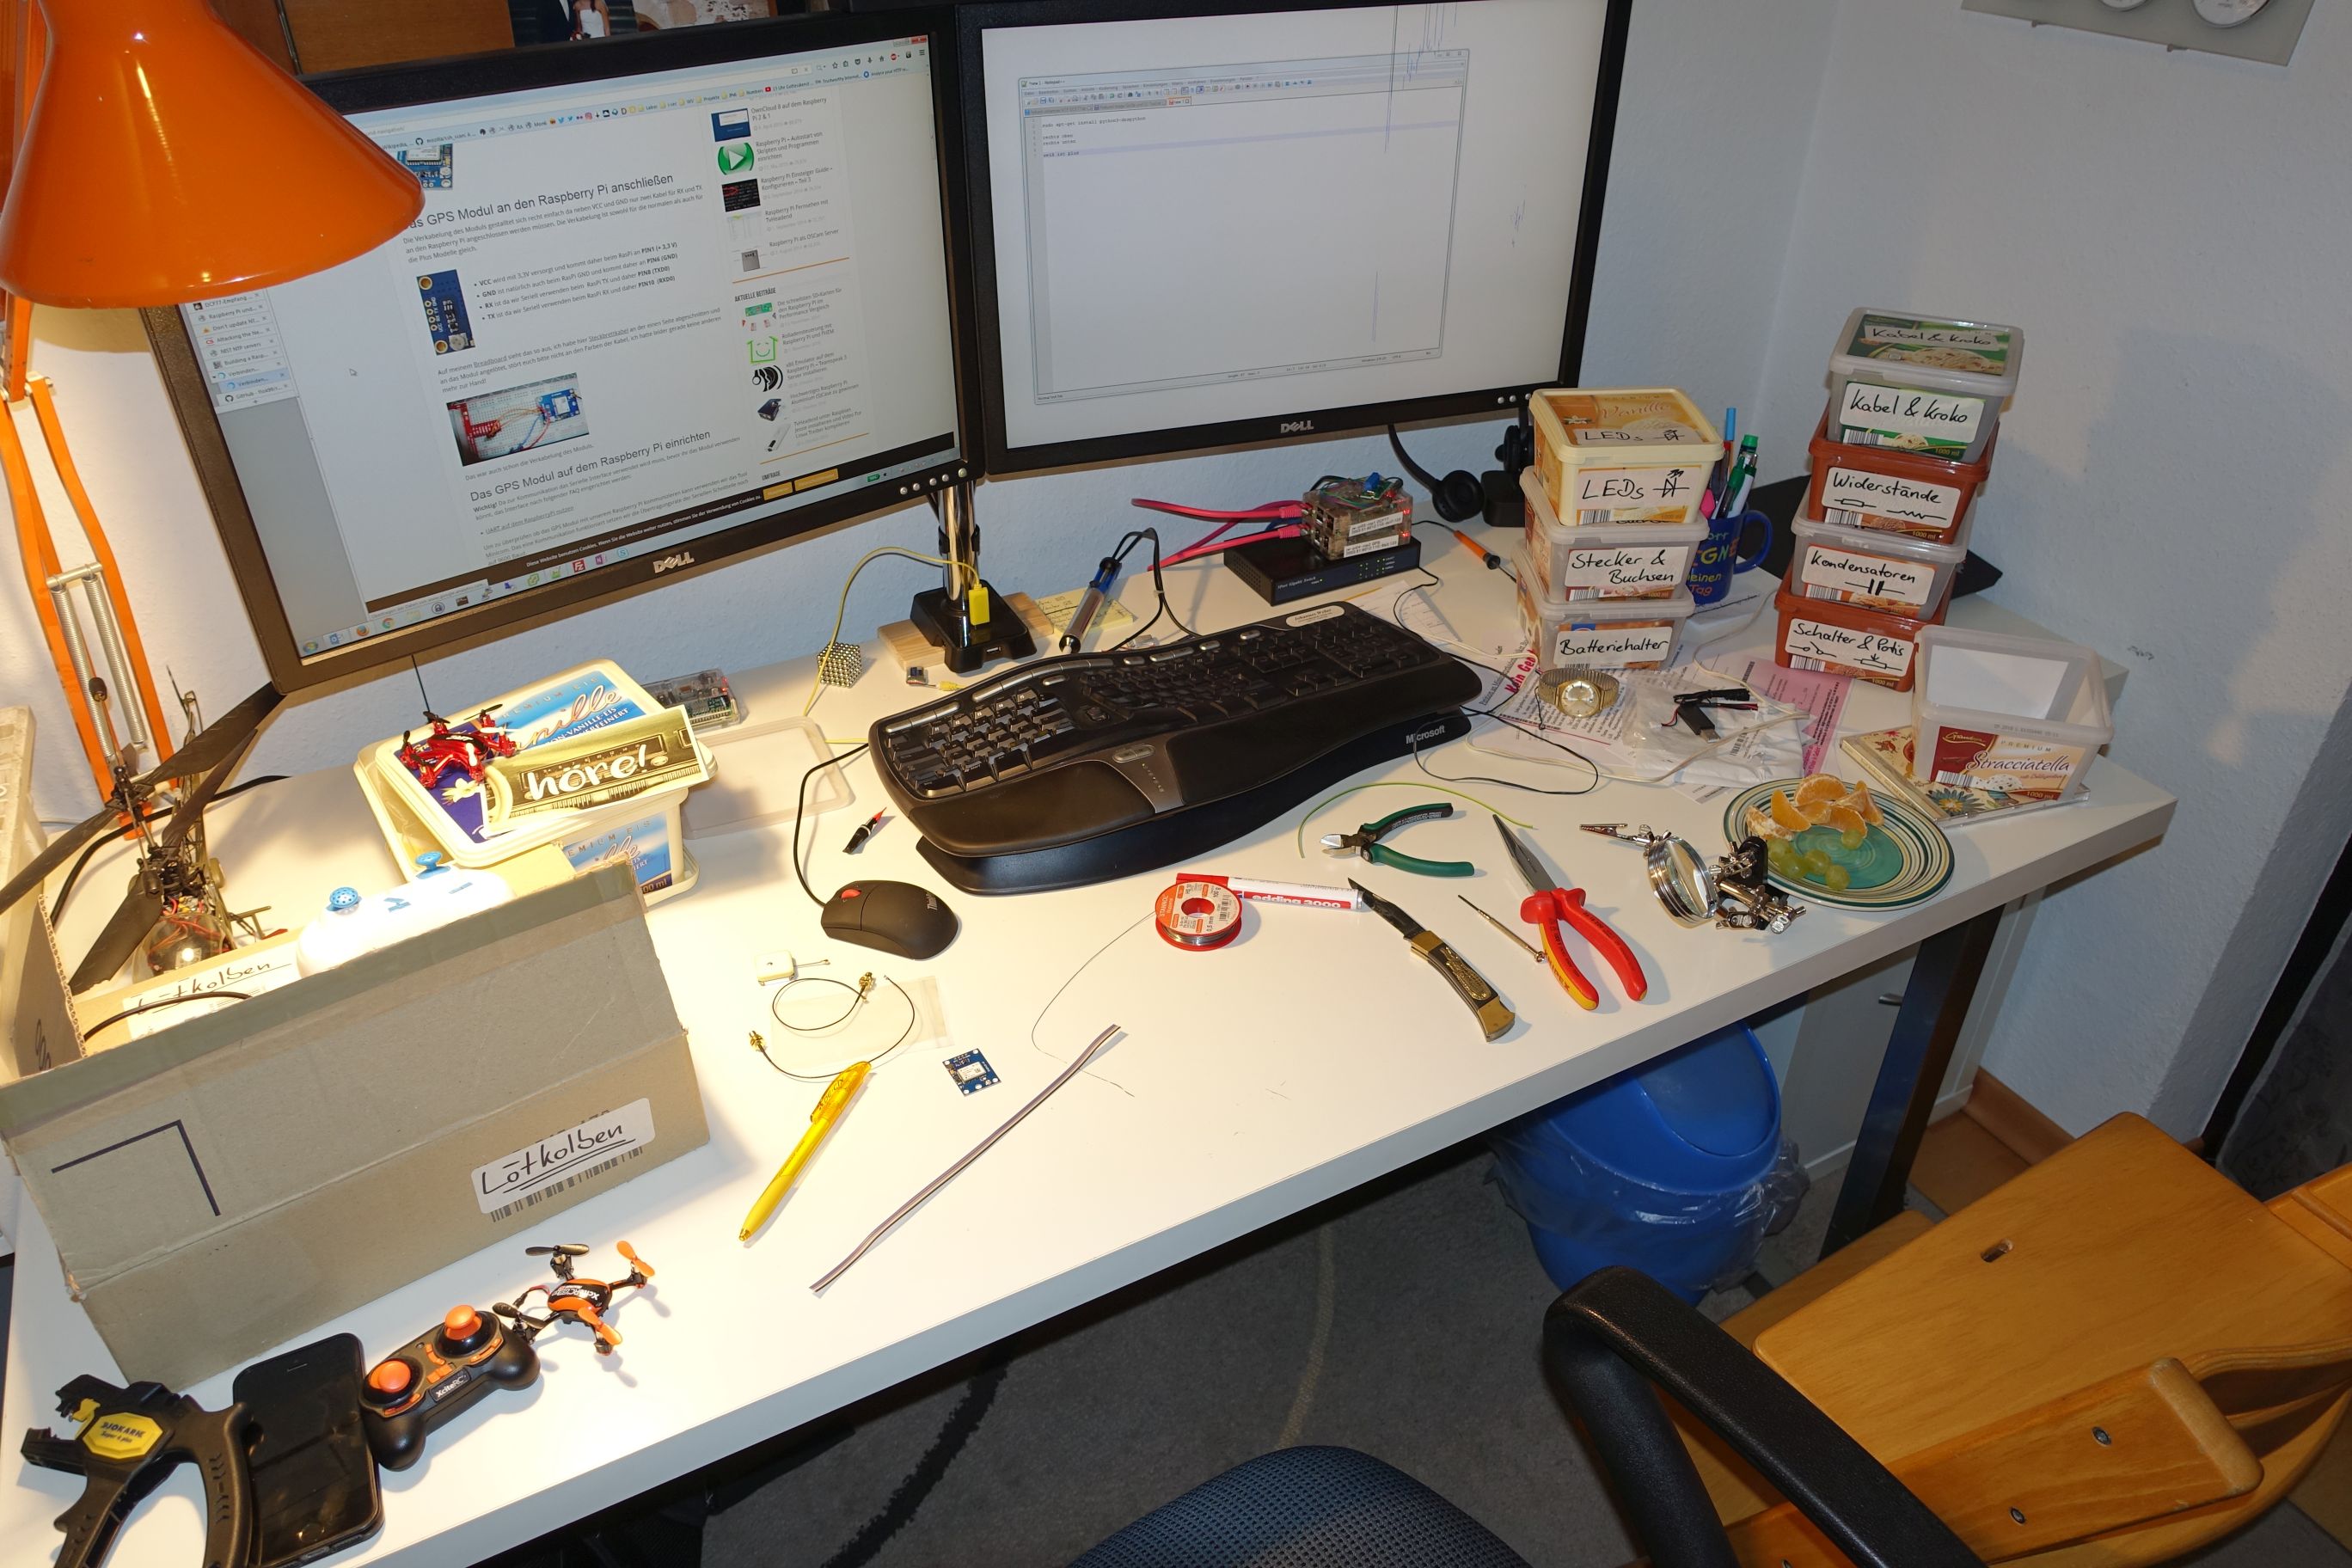
This is what it looked like on my desk:


When you’re finished you can just power on the Pi again. If you have a good GPS signal your GPS module will blink blue once a second:
2) Getting started with mere GPS
The first step is to check whether the GPS module is running and whether the Pi receives the generic NMEA 0183 sentences. You have to disable the serial login shell first while keeping the hardware port enabled: sudo raspi-config , navigate to “Interface Options” -> “P6 Serial” and:
- Would you like a login shell to be accessible over serial? –> No
- Would you like the serial port hardware to be enabled? –> Yes
followed by a reboot. After that, you can use “screen” to get some output:
|
1 |
sudo screen /dev/ttyS0 9600 |
[Thanks to the comment from Chris that you have to use /dev/ttyS0.] You can close it with Ctrl+a \ y . The output should be like this:
|
1 2 3 4 5 6 7 8 9 10 11 12 13 14 15 16 17 18 19 20 21 22 23 24 |
$GPRMC,132628.00,A,5123.20905,N,00842.80522,E,0.416,,081118,,,A*7F $GPVTG,,T,,M,0.416,N,0.771,K,A*21 $GPGGA,132628.00,5123.20905,N,00842.80522,E,1,09,1.50,235.3,M,47.4,M,,*5C $GPGSA,A,3,23,16,22,03,09,02,26,06,07,,,,2.34,1.50,1.79*07 $GPGSV,3,1,12,02,30,308,21,03,28,110,39,06,58,254,27,07,30,173,21*7D $GPGSV,3,2,12,09,87,242,12,16,08,076,21,19,10,239,,22,08,115,39*71 $GPGSV,3,3,12,23,62,066,47,26,11,050,22,30,03,191,20,39,13,117,*79 $GPGLL,5123.20905,N,00842.80522,E,132628.00,A,A*64 $GPRMC,132629.00,A,5123.20896,N,00842.80502,E,0.130,,081118,,,A*76 $GPVTG,,T,,M,0.130,N,0.241,K,A*26 $GPGGA,132629.00,5123.20896,N,00842.80502,E,1,09,1.50,235.3,M,47.4,M,,*54 $GPGSA,A,3,23,16,22,03,09,02,26,06,07,,,,2.34,1.50,1.79*07 $GPGSV,3,1,12,02,30,308,22,03,28,110,39,06,58,254,27,07,30,173,22*7D $GPGSV,3,2,12,09,87,242,12,16,08,076,19,19,10,239,,22,08,115,39*7A $GPGSV,3,3,12,23,62,066,47,26,11,050,22,30,03,191,20,39,13,117,*79 $GPGLL,5123.20896,N,00842.80502,E,132629.00,A,A*6C $GPRMC,132630.00,A,5123.20904,N,00842.80489,E,0.192,,081118,,,A*7E $GPVTG,,T,,M,0.192,N,0.355,K,A*2A $GPGGA,132630.00,5123.20904,N,00842.80489,E,1,09,1.50,235.1,M,47.4,M,,*56 $GPGSA,A,3,23,16,22,03,09,02,26,06,07,,,,2.34,1.50,1.79*07 $GPGSV,3,1,12,02,30,308,22,03,28,110,39,06,58,254,27,07,30,173,23*7C $GPGSV,3,2,12,09,87,242,12,16,08,076,19,19,10,239,,22,08,115,39*7A $GPGSV,3,3,12,23,62,066,47,26,11,050,21,30,03,191,20,39,13,117,*7A $GPGLL,5123.20904,N,00842.80489,E,132630.00,A,A*6C |
Now you need to install the gpsd daemon which needs to run in the background at startup: [Thanks to the comments from siga and Olli to use “systemctl enable …”]
|
1 2 3 4 5 6 7 8 9 10 11 12 |
sudo apt install gpsd gpsd-clients sudo nano /etc/default/gpsd # adjust the following values to: START_DAEMON="true" USBAUTO="false" DEVICES="/dev/ttyS0" GPSD_OPTIONS="-n" sudo systemctl enable gpsd.service sudo reboot |
After the reboot, check that the daemon is running:
|
1 2 3 4 5 6 7 8 9 10 11 12 |
pi@pi06-dach:~ $ sudo systemctl status gpsd.service ● gpsd.service - GPS (Global Positioning System) Daemon Loaded: loaded (/lib/systemd/system/gpsd.service; enabled; vendor preset: enabled) Active: active (running) since Sat 2021-10-09 13:23:41 CEST; 1min 18s ago Process: 387 ExecStart=/usr/sbin/gpsd $GPSD_OPTIONS $DEVICES (code=exited, status=0/SUCCESS) Main PID: 412 (gpsd) Tasks: 2 (limit: 2088) CGroup: /system.slice/gpsd.service └─412 /usr/sbin/gpsd -n /dev/ttyS0 Oct 09 13:23:40 pi06-dach systemd[1]: Starting GPS (Global Positioning System) Daemon... Oct 09 13:23:41 pi06-dach systemd[1]: Started GPS (Global Positioning System) Daemon. |
With tools such as cgps -s or gpsmon you get user-friendly information from your GPS module. You should see a “3D” fix, the correct position from the GPS receiver, and many satellites in view:
|
1 2 3 4 5 6 7 8 9 10 11 12 13 14 15 16 17 18 19 |
┌──────────────────────────┐┌─────────────────────────────────────────────────┐ │Ch PRN Az El S/N Flag U ││ECEF Pos: +4012339.72m +611236.24m +4812371.38m │ │ 0 2 305 33 23 040f Y ││ECEF Vel: +0.23m/s +0.21m/s +0.07m/s │ │ 1 3 113 24 42 070f Y ││ │ │ 2 4 0 165 0 0110 ││LTP Pos: 50.108056321° 8.682167572° 211.70m │ │ 3 6 246 57 20 040e ││LTP Vel: 0.23m/s 131.7° 0.22m/s │ │ 4 7 172 34 34 070f Y ││ │ │ 5 9 44 88 30 060f Y ││Time: 45 15:57:10.00 │ │ 6 16 73 10 29 050f Y ││Time GPS: 2026+394543.000 Day: 4 │ │ 7 19 236 6 20 040f Y ││ │ │ 8 22 116 5 37 070e ││Est Pos Err 7.21m Est Vel Err 0.00m/s │ │ 9 23 66 59 49 070f Y ││PRNs: 9 PDOP: 1.4 Fix 0x03 Flags 0xdf │ │10 26 46 12 23 040f Y │└─────────────────── NAV_SOL ─────────────────────┘ │11 29 353 1 0 0104 │┌─────────────────────────────────────────────────┐ │12 30 191 6 36 070f Y ││DOP [H] 0.9 [V] 1.1 [P] 1.4 [T] 0.6 [G] 1.5 │ │13 123 151 28 41 061c │└─────────────────── NAV_DOP ─────────────────────┘ │14 124 163 31 0 0110 │┌─────────────────────────────────────────────────┐ │15 126 117 13 0 0014 ││TOFF: 0.156538000 PPS: │ └────── NAV_SVINFO ────────┘└─────────────────────────────────────────────────┘ |
Good so far. Your GPS is up and running. ;D

3) Leveraging PPS
You now have to activate the pulse per second functionality:
|
1 2 3 4 5 6 7 8 9 10 11 |
sudo apt install pps-tools sudo nano /boot/config.txt # add the following line: dtoverlay=pps-gpio sudo nano /etc/modules # add the following line: pps-gpio sudo reboot |
After the reboot, check that the pps module is loaded, which is the case if “lsmod” lists some drivers such as this:
|
1 2 3 4 |
pi@ntp2-gps:~ $ lsmod | grep pps pps_ldisc 2413 2 pps_gpio 3089 1 pps_core 8606 4 pps_gpio,pps_ldisc |
and try to get a tick every second (cancel it with Ctrl+c as always):
|
1 2 3 4 5 6 7 8 9 10 11 |
pi@ntp2-gps:~ $ sudo ppstest /dev/pps0 trying PPS source "/dev/pps0" found PPS source "/dev/pps0" ok, found 1 source(s), now start fetching data... source 0 - assert 1541684326.001410675, sequence: 79 - clear 0.000000000, sequence: 0 source 0 - assert 1541684327.001418675, sequence: 80 - clear 0.000000000, sequence: 0 source 0 - assert 1541684328.001424675, sequence: 81 - clear 0.000000000, sequence: 0 source 0 - assert 1541684329.001432675, sequence: 82 - clear 0.000000000, sequence: 0 source 0 - assert 1541684330.001437675, sequence: 83 - clear 0.000000000, sequence: 0 source 0 - assert 1541684331.001445675, sequence: 84 - clear 0.000000000, sequence: 0 ^C |
Good again.
4) Configuring NTP
I have first installed NTP via
|
1 |
sudo apt install ntp |
to have all those dependencies and startup scripts in place, but built it from source afterwards as well to run the server in the latest version:
|
1 2 3 4 5 6 7 8 9 10 11 12 13 14 15 16 17 18 19 20 21 |
sudo nano /etc/apt/sources.list # uncomment the line with "deb-src" deb-src http://raspbian.raspberrypi.org/raspbian/ stretch main contrib non-free rpi sudo apt update sudo apt -y build-dep ntp # download the latest ntp: https://www.ntp.org/downloads.html # in this example it was 4.2.8p12 wget http://www.eecis.udel.edu/~ntp/ntp_spool/ntp4/ntp-4.2/ntp-4.2.8p12.tar.gz tar zxf ntp-4.2.8p12.tar.gz cd ntp-4.2.8p12/ # note: the following step takes some time: ./configure --prefix=/usr # note: the following "make" takes even longer, especially on an old Pi 1 B make sudo systemctl stop ntp.service sudo make install # to disable updating ntp via apt, echo the following: echo "ntp hold" | sudo dpkg --set-selections sudo systemctl start ntp.service |
(Fun fact: Since I am running my NTP server via IPv6-only meanwhile the NTP download page is IPv4-only, I had to download and copy the ntp package from another machine to the Raspberry Pi. Sigh. Yes, I know, DNS64/NAT64 would solve the problem.)
You have just installed the latest version of NTP, while “holding” the ntp package within dpkg to not overriding/downgrading it with future “apt update”s. You can verify this with the following: (Note the “h” in the very first column which indicates that the ntp package is on hold.)
|
1 2 |
pi@ntp2-gps:~ $ dpkg -l | grep ntp hi ntp 1:4.2.8p10+dfsg-3+deb9u2 armhf Network Time Protocol daemon and utility programs |
Similarly, you can verify the running ntp version with:
|
1 2 |
pi@ntp2-gps:~ $ ntpq --version ntpq 4.2.8p12@1.3728-o Thu Nov 8 11:55:00 UTC 2018 (1) |
Now you need to add the reference clock (GPS + PPS) to NTP: “Drivers have addresses in the form 127.127.t.u, where t is the driver type and u is a unit number in the range 0-3 to distinguish multiple instances of the same driver”, Reference Clock Support. In fact, we have to use two drivers, one for the GPS to get the rough time (driver 28, SHM, shared memory driver which uses the gpsd daemon) and another one for the PPS (driver 22).
There are a few things to consider. First, concerning the PPS: “While this driver can discipline the time and frequency relative to the PPS source, it cannot number the seconds. For this purpose an auxiliary source is required, ordinarily, a radio clock operated as a primary reference (stratum 1) source; however, another NTP time server can be used as well. For this purpose, the auxiliary source should be specified as the prefer peer, as described in the Mitigation Rules and the prefer Keyword page”, PPS Clock Discipline. And about the SHM and its “flag1”: “Skip the difference limit check if set. Useful for systems where the RTC backup cannot keep the time over long periods without power and the SHM clock must be able to force long-distance initial jumps. Check the difference limit if cleared (default)”, Shared Memory Driver.
In the end, I used these lines for my two drivers in the sudo nano /etc/ntp.conf file:
|
1 2 3 4 5 6 7 |
# pps-gpio /dev/pps0 server 127.127.22.0 minpoll 4 maxpoll 4 fudge 127.127.22.0 refid PPS # gpsd clock via shm server 127.127.28.0 minpoll 4 maxpoll 4 prefer fudge 127.127.28.0 time1 +0.130 refid GPS flag1 1 |
in conjunction with some more (in my case: IPv6 capable) NTP servers:
|
1 2 3 4 5 6 7 8 |
#https://support.ntp.org/bin/view/Servers/PublicTimeServer000388 server ntp.probe-networks.de prefer #https://support.ntp.org/bin/view/Servers/PublicTimeServer001352 server time.hueske-edv.de prefer #https://support.ntp.org/bin/view/Servers/PublicTimeServer000840 server ntp2.301-moved.de prefer #https://support.ntp.org/bin/view/Servers/PublicTimeServer001363 server ntp.fanlin.de prefer |
(Note that I used “fudge 127.127.28.0 time1 +0.130 …” to adjust the GPS time according to the other NTP servers. You can try some higher/lower values to have the offset of your SHM compared to the offsets of those other NTP servers very small.)
|
1 |
sudo systemctl restart ntp.service |
Finally, it should give you something like this:
|
1 2 3 4 5 6 7 8 9 10 |
pi@ntp2-gps:~ $ ntpq -p remote refid st t when poll reach delay offset jitter ============================================================================== oPPS(0) .PPS. 0 l 9 16 377 0.000 0.002 0.004 *SHM(0) .GPS. 0 l 11 16 377 0.000 -2.163 1.915 ptbtime2.ptb.de .PTB. 1 u 1 64 377 10.318 0.258 0.112 +ns2.probe-netwo 124.216.164.14 2 u 22 64 377 3.591 -0.137 0.308 +2a01:4f8:201:41 192.53.103.108 2 u 14 64 377 16.534 -4.055 0.094 +2a02:a00:1009:6 193.190.230.65 2 u 65 64 377 6.683 -0.072 0.124 +2001:4ba0:ffa4: 130.149.17.21 2 u 18 64 377 6.266 -2.095 0.117 |
Note the ° symbol (= PPS peer when the prefer peer is valid) before the PPS, as well as the * symbol (= system peer) before the SHM; refer to Peer Status Word. These symbols must be present, but it will take some time initially. Otherwise, your instance is not working correctly, which would show an x instead.
Congratulations! You have your own NTP server on a Raspberry Pi with GPS and PPS up and running. Go for it! :D
5) Enhanced PPS Performance
[UPDATE Nov. 2018] Please note that I was not able to reproduce this behaviour on a fresh Raspbian stretch installation in 2018 anymore. Independent of the below-mentioned settings the jitter of the PPS was about 4 µs. The following listings are from an NTP server with Raspbian jessie, kernel 4.4.26+, in 2016/2017.[/UPDATE]
I came across the very detailed page from David Taylor in which he has some thoughts about reducing the (already very good) jitter for the PPS. Section “Enhanced PPS performance” on his page.
I opened the file sudo nano /boot/cmdline.txt and added nohz=off at the end of this single line. Of course with a space before it. Followed by a sudo reboot.
The jitter of the PPS driver decreased from about 0.005 ms = 5 µs to about 2 µs. Wow!
|
1 2 3 4 5 6 7 8 9 10 11 12 13 14 15 16 17 18 19 |
# BEFORE pi@ntp2:~ $ ntpq -p remote refid st t when poll reach delay offset jitter ============================================================================== oPPS(0) .PPS. 0 l 15 16 377 0.000 -0.005 0.005 *SHM(0) .GPS. 0 l 14 16 377 0.000 -1.734 1.173 name3.glorb.com 216.218.254.202 2 u 8 64 377 175.817 -2.305 0.220 2001:19f0:6c01: 36.224.68.195 2 u 60 64 377 2.282 0.936 0.078 isis.uni-paderb 192.53.103.108 2 u 13 64 377 9.797 1.354 6.588 # AFTER pi@ntp2:~ $ ntpq -p remote refid st t when poll reach delay offset jitter ============================================================================== oPPS(0) .PPS. 0 l 4 16 377 0.000 -0.001 0.002 *SHM(0) .GPS. 0 l 7 16 377 0.000 -0.166 1.897 ntp5.netcompart 193.79.237.14 2 u 25 64 377 6.924 1.350 2.424 headnode.szeged 0.67.4.139 2 u 20 64 377 22.045 0.309 0.220 ftp.icm.edu.pl 210.100.177.101 2 u 61 64 377 19.681 0.261 0.146 |
6) Reducing Ethernet Latency
And even one more hint from David Taylor about reducing the Ethernet latency on a Pi: Adding another option to the single line in sudo nano /boot/cmdline.txt that states: smsc95xx.turbo_mode=N (reboot needed) indeed reduces the “delay” as shown in the “ntpq -p” output again. I used two Raspberry Pis connected via a single switch, the first time without the option, the second with the option set on both Pis. The delay between those NTP servers decreased from about 0.916 ms to 0.632 ms. Nice.
|
1 2 3 4 5 6 7 8 9 10 11 12 13 14 15 |
# BEFORE pi@ntp1-dcf77:~ $ ntpq -p remote refid st t when poll reach delay offset jitter ============================================================================== GENERIC(0) .DCFa. 0 l - 64 0 0.000 0.000 0.000 *2003:de:2016:33 .PPS. 1 s 28 64 377 0.916 1.125 0.759 ptbtime2.ptb.de .PTB. 1 u 26 64 377 9.782 1.081 0.419 # AFTER pi@ntp1-dcf77:~ $ ntpq -p remote refid st t when poll reach delay offset jitter ============================================================================== GENERIC(0) .DCFa. 0 l - 64 0 0.000 0.000 0.000 *2003:de:2016:33 .PPS. 1 s 24 64 377 0.632 0.120 0.737 ptbtime2.ptb.de .PTB. 1 u 35 64 377 9.444 1.592 0.554 |
That’s it for now. Wow! If you have any suggestions, please write a comment.
Appendix
In the meantime, we have moved to our own house in which I was finally able (allowed) to mount a professional GPS antenna on my very own rooftop:
Yay, I installed a professional GPS antenna on my rooftop for my stratum 1 #NTP server. You can use it at https://t.co/xJcLmLJr1Q, #IPv6-only. Meanwhile, it is part of the #NTPPool. Want to set up your own GPS-based NTP server? Here we go: https://t.co/W4VUccEsJd pic.twitter.com/BBoJ1kepih
— Johannes Weber ? (@webernetz) October 4, 2022
Links
As always here are some links for further reading:
- (de) raspberry.tips – GPS Modul mit dem Raspberry Pi – Ortung und Navigation
- (de) raspberry.tips – Raspberry Pi Uhrzeit über GPS beziehen – Zeitserver
- David Taylor – Quick start NTP on the Raspberry Pi
- David Taylor – The Raspberry Pi as a Stratum-1 NTP Server
Featured image “Kompass_.jpg” by Rolf Schmitz is licensed under CC BY-SA 2.0.
I’ve followed your directions after finding many others out of date. I now have a Raspberry pi running with 0.001 offset and 0.001 jitter, with 19 NTP servers listed in the config.
Thanks SO much for your efforts.
This is a good article but in many systems NTP servers operate in intranet networks, without internet. Hence, an NTP server should be able to operate with only GPS (or radio) clock source. If you can update the article and it operates in “standalone” mode, then this will be a perfect article.
The prefer at the end of the “server 127.127.28.0 minpoll 4 maxpoll 4 prefer” line says to use 1pps for that clock. At some point in the past, that prefer would only work on one server line and it didn’t work on the serial port. I use use driver 20 and avoid gpsd which uses driver 28.
Hey ilk,
I tried to use this GPS-based NTP approach to run the server completely standalone, but I did not succeed. I had many situations in which the server did not get the correct time for whatever reason. Hence I am using some additional servers on the Internet with the “prefer” statement.
I you really want to operate an own NTP server for enterprise environments you should NOT rely on a Raspberry Pi anyway. Please have a look at the NTP servers from Meinberg (available with different kind of radio sources such as GPS, DCF77, Galileo, …): https://weberblog.net/ntp-appliance-meinberg-lantime-syncfire/
Cheers
Johannes
Vou may try using “chrony” (https://gpsd.gitlab.io/gpsd/gpsd-time-service-howto.html#_feeding_chrony_from_gpsd) instead of ntp. As they say: …Chrony is designed for long periods of offline use… Just follow this webernetz guide up to step 3, and replace step 4 by a chrony installation.
Many GPS devices allow you to put them in timekeeping mode where they assume they aren’t moving. Combining that with just sending the time sequence, the delays are much more predictable and the jitter will drop.
Some samples of controlling them to help with web searches:
For the Uputronics board:
/home/pi/src/gpsControl -s -d /dev/ttyAMA0
echo \$PUBX,40,ZDA,0,1,0,0*45 >/dev/gps0 #turn on GPZDA
echo ‘$PUBX,40,GSV,0,0,0,0*59’ >/dev/gps0 #turn off PUBX
For the Adafruit to get just the GPZ sequence:
printf ‘$PMTK314,0,0,0,0,0,0,0,0,0,0,0,0,0,0,0,0,0,1,0*29\r\n’ >/dev/serial0
Tthe /dev/ names differ between RPi boards and clock 20 needs a /dev/gps0 so its link to /dev/serial0 to /dev/ttyAMA0
The *29 is a checksum. Some units need a cr/lf and others don’t care.
Worked flawlessly for me, both with a cheap chinese breakout card with an Ublox NEO-6M-0-001 chip and a small antenna, using NMEA and PPS, and with an old, (forgotten in a drawer ) USB version Ublox Gps, in this case only with NMEA. Thanks for your fine work!
really nice site, I am in love with NTP in general, at work we have symmetricom appliances with rubidium oscillators
just a hint, the correct way to enable a service with systemd is
root@time0:~# systemctl enable gpsdSynchronizing state of gpsd.service with SysV service script with /lib/systemd/systemd-sysv-install.
Executing: /lib/systemd/systemd-sysv-install enable gpsd
Created symlink /etc/systemd/system/multi-user.target.wants/gpsd.service → /lib/systemd/system/gpsd.service.
root@time0:~# systemctl status gpsd
● gpsd.service - GPS (Global Positioning System) Daemon
Loaded: loaded (/lib/systemd/system/gpsd.service; enabled; vendor preset: enabled)
Active: active (running) since Thu 2019-12-12 16:32:01 CET; 4min 18s ago
Main PID: 1164 (gpsd)
Tasks: 1 (limit: 2319)
Memory: 556.0K
CGroup: /system.slice/gpsd.service
└─1164 /usr/sbin/gpsd
another suggestion: gives chronyd a chance, it still “speak” NTP but it’s way better in general, and in particular for virtual machines or machines with a bad hardware clock
Also, no need to compile it
root@time0:~# grep -Ev "^#|^[[:blank:]]*$" /etc/chrony/chrony.confrefclock SHM 0 offset 0.000 delay 0.000 refid NMEA noselect
refclock PPS /dev/pps0 lock NMEA refid PPS
server 0.ch.pool.ntp.org iburst minpoll 5 maxpoll 6 noselect
server 1.ch.pool.ntp.org iburst minpoll 5 maxpoll 6 noselect
server 2.ch.pool.ntp.org iburst minpoll 5 maxpoll 6 noselect
server 3.ch.pool.ntp.org iburst minpoll 5 maxpoll 6 noselect
driftfile /var/lib/chrony/chrony.drift
logdir /var/log/chrony
maxupdateskew 100.0
rtcsync
makestep 1 3
root@time0:~# chronyc sources
210 Number of sources = 6
MS Name/IP address Stratum Poll Reach LastRx Last sample
===============================================================================
#? NMEA 0 4 377 18 +127ms[ +127ms] +/- 370us
#* PPS 0 4 377 19 +607ns[ +797ns] +/- 303ns
^? tock.ntp.infomaniak.ch 1 5 377 1 +432us[ +432us] +/- 7303us
^? 162.159.200.123 3 5 377 2 -1076us[-1076us] +/- 13ms
^? ns1.nexellent.net 2 5 377 1 +2073us[+2073us] +/- 44ms
^? eudyptula.init7.net 2 5 377 1 +1828us[+1828us] +/- 57ms
root@time0:~# chronyc sourcestats
210 Number of sources = 6
Name/IP Address NP NR Span Frequency Freq Skew Offset Std Dev
==============================================================================
NMEA 6 3 81 -22.907 140.278 +126ms 883us
PPS 17 7 256 +0.000 0.009 +0ns 767ns
tock.ntp.infomaniak.ch 12 7 265 -0.134 4.495 +167us 292us
162.159.200.123 12 7 265 -0.469 2.341 -1152us 179us
ns1.nexellent.net 12 9 265 +0.542 4.079 +1922us 317us
eudyptula.init7.net 12 6 265 -0.801 1.698 +1678us 116us
I wrote a post in my blog, I linked your site as reference
https://www.signorini.ch/content/gps-for-time-synchronization
Your link is blocked “for security reasons”. Do you want someone to visit it? Then better free it up
It’s an issue I have since few months between Chrome and my nginx, I need manual actions every nginx update… it should be OK now.
Hello Johannes, how are you? Related to this post, do you know if it is possible to output a 1PPS signal from the system clock through one of the Raspberry Pi GPIO pins? Many thanks – Ricardo.
Uh, good question. I have no idea. Sorry.
What do you need it for? A professional reason? Then you should probably rely on a professional clock as well…
Just “for fun”. We would like to compare the results of “ppstest” with the results using an external time interval counter.
Hi Johannes,
very good guide. I foud your guide because I was struggling with autostart of the gpsd.
I would highly recommend to add a service like described by the GPSD project:
https://gpsd.gitlab.io/gpsd/troubleshooting.html
instead of using
# the following symlink is needed to have gpsd started after boot correctly
# ref: https://www.raspberrypi.org/forums/viewtopic.php?f=45&t=53644#p1048128
sudo ln -s /lib/systemd/system/gpsd.service /etc/systemd/system/multi-user.target.wants/
Yup, you’re absolutely correct. I will update this post once I am setting up another Pi with GPS (which will probably be within the next 12 months). ;)
On the Pi3B you use /dev/ttyS0 instead of /dev/ttyAMA0 which is now used for the bluetooth serial interface. I think that’s true on Pi4 as well.
Nice. Thanks for that! I was just trying my own tutorial here but did not succeed until I read your comment. ;)
In my experience, when there aren’t external servers to synchronize against, the prefer keyword on 28.0 causes ntp to first sync to the gps serial (hundreds of milliseconds off) and very slowly drift to the pps. Instead I use the noselect keyword for gps and the prefer keyword for pps. Also, I get 1pps from the gpsd driver (SHM1) 28.1 vs from the pps driver (PPS) 22.0, seems to work OK.
Ok cool. Thanks for that!
Hi !
Can you please provide a more detailled pic where you get the PPS Signal on this PCB ?
Ciao Gerd
Hello Gerd,
well, you can zoom into the picture on the blog already, which gives you a quite detailed view of it: https://weberblog.net/wp-content/uploads/2018/11/DSC01670-PPS-angel%C3%B6tet.jpg
If this is not enough, you can try to Google after it. ;) The name of the module is GY-GPS6MV2. As far as I remember, one of the pins of the chip has the PPS signal, while it was easier to solder it on the resistor which leads to the LED rather than on the chip itself.
Cheers
Johannes
Danke ! Das fonktionniert für mich ! I hatte soviel gesucht…
Hello Johannes,
thanks a lot for this guide. Tried the setup with an RPi 4 and 5.10 kernel. Works (nearly out of the box) as expected. The gpsd service as well as the ntpd service is already there, when you install from the recent raspian repositority. So after compiling the newest version of ntpd you have to set it just on hold as you wrote. To enable the service just type
‘sudo systemctl enable ntp && sudo systemctl start ntp’ (same with the gpsd)
In the standard config file I had to make some changes. It may be useful for other readers, as well. Several time queries worked well until the moment as the ntp server gets some load (maybe 5 to 10 queries per second. Than the clients get a 500 error and timeouts. I searched for that behavior for a while. I had to comment out the directives kod & limited, to get the server work with load as expected.
‘
# By default, exchange time with everybody, but don’t allow configuration.
restrict -4 default notrap nomodify nopeer noquery # kod limited
restrict -6 default notrap nomodify nopeer noquery # kod limited
‘
Furtermore I proxied the RPi4 through an nginx on an other machine. That could be interesting to the readers as well. That is very useful to not expose the whole RPi4 to the internet, and as well you can do some load balancing if you have a lot of clients and/or more than one timeserver. In my case its, because I only have one public IPv4 that I can use for that.
I used the nginx stream directive with a small logging format to do that. Here ist my workling config (just set the proper IPs).
‘
stream {
#set Log Format
log_format upstream ‘$remote_addr [$time_local] ‘
‘$protocol $status $bytes_sent $bytes_received ‘
‘$session_time ‘
‘$upstream_addr’;
# ntp upstream pool
upstream time {
server 192.168.xx.xx:123;
#server 192.168.xx.xx:123;
#server 192.168.xx.xx:123;
#server 192.168.xx.xx:123 backup;
}
# Time server proxy
server {
listen 123 udp;
listen [::]:123 udp;
access_log /var/log/nginx/time.access upstream;
error_log /var/log/nginx/time.error;
proxy_timeout 5s;
proxy_requests 1;
proxy_responses 1;
proxy_pass time;
}
}
‘
I highly recomment to turn of logging after you checked that all works well. The ntp is such a small protocol and the log will be huge in a couple of hours if you expose the timeserver to pool.ntp.org.
So have fun
Best
Ulli
Hey Ulli,
thanks for your hints!
Concerning the “kod & limited”: To my mind this kicks in if the *same* clients sends to many queries. Not if many clients send queries. Maybe you are using a NAT device in front of the Pi so that the ntpd see the same incoming IP address for this? As I used my Pis for IPv6 only, I was not using any kind of NAT. I didn’t had any problems with rate limits (as far as I know).
I used an F5 load balancer for my NTP services. There I had to disable the rate limits as well: https://weberblog.net/load-balancing-ntp-via-f5-big-ip-ltm/
Blessings,
Johannes
That could be the problem. I don’t use NAT but the proxy.
Falls du nach wie vor den gpsd verwendest: bis Mitte/Ende Oktober updaten sonst gibt’s ‘ne Zeitreise ?
https://gitlab.com/gpsd/gpsd/-/issues/144
Haha, danke für den Hinweis. Ouch… ;)
Congratulations! The first concise and coherent blog on this topic.
Unfortunately most such blogs incl. the gpsd site are fragmented, obtuse, incoherent and overfilled with useless information. I spent days figuring out that I needed to connect the ublox PPS pin to a GPIO pin on the Rpi and then pipe it to pps0. Then days trying to get the gpsd compiled with the right flags so that I do not get “PPS ioctl(TIOCMIWAIT) failed”. gpsd tell you that this is bad, but offer no solution!
Do you have such an excellent blog post combining Rpi, gpsd and chrony/NTPsec?
I suspect that my pps0 is not being piped through to gpsd, even though the ntpq -p ouput seems ok:
PPS(0) .PPS. 0 l – 16 0 0.000 +0.000 0.002
*SHM(0) .GPS. 0 l – 16 1 0.000 +49.184 0.002
When I run ppscheck I get:
pi@raspberrypi-101:~/ntp-4.2.8p15 $ sudo ppscheck /dev/pps0
# Seconds nanoSecs Signals
PPS ioctl(TIOCMIWAIT) failed: 25 Inappropriate ioctl for device
According to gpsd website it should be KPPS.
OK, I solved this by downloading the latest version of gpsd, cd-ing into gpsd and then building with the following flags:
pi@raspberrypi-101:~ $ sudo scons pps=yes ntpshm=yes nmea0183=yes ublox=yes fixed_port_speed=38400 fixed_stop_bits=1
Then:
pi@raspberrypi-101:~ $ sudo scons check && udev-install
In /boot/config.txt:
dtoverlay=pps-gpio,gpiopin=18,capture_clear
When I run:
sudo ppscheck /dev/pps0
I now get:
pi@raspberrypi-101:~ $ sudo ppscheck /dev/pps0
INFO: ioctl(/dev/pps0, TIOCMGET) failed: Inappropriate ioctl for device(25)
INFO: /dev/pps0 does not appear to be a tty
INFO: kpps_caps 0x11F3
PPS_CAPTUREASSERT
PPS_CAPTURECLEAR
PPS_CAPTUREBOTH
PPS_OFFSETASSERT
PPS_OFFSETCLEAR
PPS_CANWAIT
PPS_ECHOASSERT
PPS_ECHOCLEAR
PPS_TSFMT_TSPEC
# Src Seconds Signal Sequence
KPPS 1658872884.068078399 assert 59
KPPS 1658872883.168062214 clear 58
KPPS 1658872884.168074787 clear 59
…
Now I get this for ntpq -p :
oPPS(0) .PPS. 0 l 10 16 377 0.000 +3.230 0.263
xSHM(0) .GPS. 0 l 3 16 377 0.000 +70.159 0.425